
Today’s post covers environments in Business Central, with a large focus on the functionality held within the Admin Center. Environments are managed by a company’s designated system administrator. We will cover what this entails throughout the post.
Explaining environments
An environment is the platform which hosts the companies in which your data sits. You can have several environments on a tenant. You can have multiple Business Central environments. Against any environment, you can have multiple companies. The image below illustrates this structure:

The ‘Gold’, ‘Live’ and ‘Test’ reflect typical companies you might have in a Production environment. All companies in a Sandbox environment are essentially ‘test’ companies.
As mentioned, there are two types of environments:
- Production
- Sandbox
A Production environment is where you hold real business data. Whilst you can have a ‘test’ company in the Production environment, it’s recommended that the majority of user testing takes place in the Sandbox environment. This might be testing new development work, upgrades to later versions or assessing the quality of migrated data. When you’re comfortable with what you are testing, feel free to move to the Production environment.
Sandbox environments aren’t designed to be used in the same way as a Production environments. Part of the reason for this is that Production environments are backed up frequently, whereas Sandbox environments aren’t. This means, whenever there’s an issue in a Sandbox environment, you must either export the data using Rapidstart, or delete the environment and create another one. Sandbox environments also don’t run in the same performance tier in Azure, so the performance quality isn’t as high.
For both Premium and Essential subscription types, Business Central users have access to one Production and three Sandbox environments.
Choosing between environments in Business Central
On the latest version of Business Central (ver. 21), there’s been a handy development. You can easily navigate between both environments and companies without having to navigate elsewhere. To do so, simply click where it says ‘Environment’ and you should see a list of all companies in each of your environments:

I’ve blacked out some of the company names as they relate to customers. However, to access a particular company, simply click the one you wish to enter into. This ability to switch between companies in both environments so simply is a nice timesaver.
Managing Business Central environments in the Admin Center
To manage environments in Business Central, you must be a system administrator. If you are not set up as a system administrator, you will not be able to see the Admin Center action. Whilst the below screenshots are taken on two environments with different versions, you can see how the Admin Center is visible for one and not the other:


By clicking on the Admin Center action, you can manage the relevant environments. The Admin Center provides lots of ways for a system administrator to manage Business Central environments. Lets look at what the system administrator can do.
The ‘Environments’ screen
When you first access the Admin Center, there should be a list of environments in a list view. By selecting one of these, we can see related information.
The ‘Details’ box
The first thing of note is the URL address for the environment, held in the ‘Details’ box. Obviously when launching an environment, it’s important that those people who require access, have the website address. You can also see the type of environment it is, its name and country/region.
The ‘Version Management’ box
In the Version Management box, the system administrator can see the current application version and the next available version after updating. They will also be able to see when the next upgrade will take place, both date and time. This can be amended. Typically an upgrade would take place outside of work hours in order to not interrupt users doing their day-to-day jobs.
If there’s no Update Version value, then there’s no available update to schedule and therefore you can’t select a date.
Establishing when a Business Central environment should update
The system administrator can see which version an environment is running in. To do so, on the side panel, click ‘Environments’, choose the relevant one and then click ‘Update Settings’ in the ribbon. By selecting the ‘set update date’ action, you can specify when you want to upgrade. As you can see in the image below, you can also specify which version you want to upgrade to:

Creating, copying and deleting environments
This section will run through the different means of creating Business Central environments, followed by deleting them.
Creating a brand new environment
In the Environments tab of the Administration Center, you can click ‘new’ to create a blank, new environment. You can choose the type, either ‘Production’ or ‘Sandbox’.

New environments are based on the latest version of Business Central.
Until the state shows ‘active’, the new environment won’t be usable.
If you’ve recently created an environment and it has a State value of Preparing, you can’t access, amend or delete it until the State value changes to Active.
Copy an existing Business Central environment
Another way of creating a new environment is by copying an existing one. This is useful if you want to duplicate your Production environment, using the newly created one for testing. To do so, in the environment you wish to copy, click ‘Copy’ in the ribbon. You’ll get a pane open on the side of your screen where you can specify the name and type of the new environment:

It’s now possible to copy environments, from Sandbox to Production. This means you can now create either type of environment from the other.
Note, where only one Production environment is allowed per tenant, if you amend the ‘New environment type’ value to ‘Production’, you will get this error:

Converting a demo system to a live environment
Let’s use a hypothetical scenario where, during a trial period, a potential customer decides to proceed with employing Business Central as their ERP system. They are currently in a demo system provided by their Dynamics partner. That demo environment can be converted to a real environment after the 30 day trial period. It’s not compulsory to start afresh on a new Production environment; the prospect can continue using the one from the trial period. However, if the tenant belongs to the Dynamics partner and not the prospect, the prospect will receive their own tenant moving forward.
Deleting a Business Central environment
In the Admin Center, the system administrator can delete environments. Simply click the ‘Delete’ action in the ribbon.

Notification Recipients
After clicking into an environment in the Admin Center, on the left-hand side, beneath ‘Environments’, is ‘Notification Recipients’. This is where you can identify who will receive notifications for news relating to all the environments on the tenant. To do so, simply add an email address which will receive messages for any issues or changes. You can only add and delete records, not amend existing ones.
Managing apps interacting with an environment
To see which apps are interacting with a Business Central environment, select an environment and then click ‘Apps’ in the ribbon. Here you can see a list of all the apps, their version numbers and whether those versions are the most recent. If they aren’t, you can apply updates from that screen.
The records shown on this screen match those on the Extension Management page in Business Central itself, assuming you are in the corresponding environment.
Capacity
In the Capacity option, there’s a lot of useful metrics for system administrators. At the top, you can see the amount of storage used against the total that’s available. Below that, there’s a breakdown of where that storage is allocated, between the tenant and user licenses.
Below, in the Environment quota usage box, you can see the number of environments available, their type, as well as which aren’t in use:

In the ‘Storage usage by environment’ box below, it splits out the storage by individual environment. There’s also a link to the ‘list of tables’ in each environment. By drilling into this, the system administrator will see a number of records against each table as well as the total size:

Exporting a database
The system administrator can export a Business Central database.

If you click the ‘View export history’, you’ll be able to see a list view of all the times that environment’s been exported.
When it comes to importing that environment back, you may have to redeploy any extensions separately.
Extensions in Business Central
Speaking of extensions, a system administrator can upload and manage extensions for each Business Central environment they have.
Uploading extensions
On Business Central, to upload extensions, firstly navigate to the Extension Management page. Next click ‘Manage’ and then you’ll have a host of options.

By clicking ‘Upload Extension’, you’ll see a subpage where you can select the file to upload, and choose when to deploy it:

The ‘Deploy to’ field has three values to choose from:
- Current version
- Next minor version
- Next major version
Remember, Microsoft release two major updates for Business Central each year. Minor updates occur typically on a monthly basis.
Users will not be able to upload extensions to suspended Production environments, or those that haven’t been accessed in a long period. The only exception to this is if the environment only contains evaluation companies.
Will my extension disappear following an upgrade?
In short, no. Microsoft have published documentation on extensions. To quote them:
“Apps that are uploaded to the environments of both types (Production and Sandbox) using the Upload Extension action from the Extension Management page are published within a global scope. When the environment is upgraded or moved, these apps are downloaded to the service node and installed, which means that they will not disappear”.
Production and Sandbox Environments – Microsoft, 03/04/2022
Troubleshooting Business Central environments
Back in the Admin Center, there are several tools to help the system administrator with issues in a specific environment. Let’s run through these, starting with Telemetry.
Telemetry
This page contains a list of actions that have taken place in a specific environment. Against each line, there’s an Object Type, Object ID and Function Name.
By inputting a ‘-120’ value in the Minutes field, I can retrieve all the actions that have taken place within the past two hours of a selected environment:

For the purpose of troubleshooting, you can use this to identify when an event occurred.
Manage sessions
From the Admin Center page, the system administrator can cancel sessions. To do so, click ‘Environments’, followed by ‘Sessions’ in the ribbon. Here, you’ll see the current sessions:

By clicking ‘Cancel session’ on a particular line, it will remove the corresponding user from the system. This won’t prevent the user from going back into the system afterwards.
Where there’s ongoing issues, it might be advantageous to remove users from the system for a short period.
Reported Outages
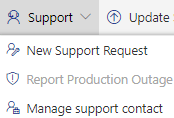
The Reported Outages screen displays support tickets. To report an outage, navigate to a specific environment. Once there, click ‘Support’ in the ribbon and then click ‘Report Production Outage’. This action is only available for Production environments. However, you can press the ‘New Support Request’ and ‘Manage support contact’ actions for all environment types.
Operations
The Operations screen is where you can see particular actions undertaken by the system administrator.
Microsoft state that whilst not every action is listed there currently, the goal is to log all admin operations in the near future. Here are some examples of actions recorded currently:
- Renaming environments
- Creating environments
- Copying environments
- Restoring environments
- Updating apps (pending)
Each record states the action, who performed it and when. Where operations fail, there’s detailed error messages to help you understand why. I’ve attached Microsoft’s short post on Operations if you are interested.
Restarting and restoring environments
The system administrator can restart an environment or restore it to a previous point in time.
Restarting a Business Central environment
The system administrator has the ability to restart an environment. The ‘Restart Environment’ action is located on the right side of the screen. This will cancel any current sessions and may take several minutes to reboot. If you click Restart Environment, you’ll get this warning message:

Restoring a Business Central environment
Microsoft allow for users to restore their environments to a point in time previously. This is helpful when the data in an environment has been corrupted. Whilst this is available, note this is more or less a last resort. When you click ‘Restore’, this screen pane appears:

Notice the ‘Backups are available from’ value in the image above. This is approximately 10 hours prior to the point of me writing. That means, that is the closest point to the present I can restore to. On the opposite end, you can restore up to a month in the past.
For any environment, there’s a maximum of 10 restores per month.
When you restore a Production environment, you have the option to restore them to a different type. So, you can restore it as a Sandbox environment if you like. Note, you can’t currently restore a Sandbox environment to a Production. You will get a warning if restoring an environment will exceed the specified quota permitted:

Closing remarks
Thanks for reading. Hopefully that’s given you some tips on managing your Business Central environments. If we’ve missed anything, please do let us know.
If you’ve any comments or queries, please do get in contact with us. We’d love to hear from you.
To never miss one of our posts, follow us on LinkedIn.